Here is an overview of Substance Painter in medical scenes that render in GPU render engines like Unity and Redshift. Hope it helps show how painter can be useful to medical illustrators, animators and game level designers.
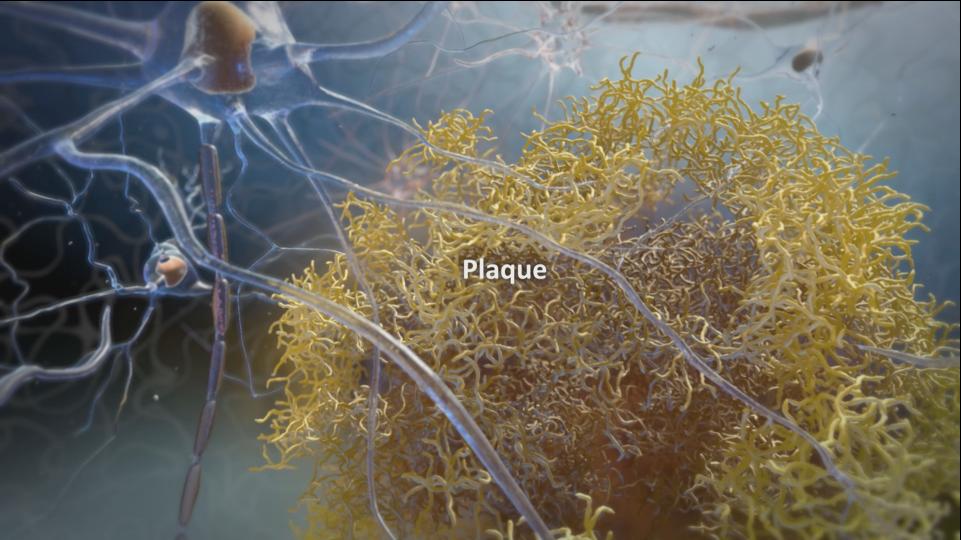
Experimental drug reduces protein clumps and slows memory loss in early Alzheimer’s
–
With lots of modeling, animation, motion graphics and video editing help from the team, this piece was produced in roughly two months.
–
Cinema 4D’s render instances and mograpgh tools allowed the scenes to render quickly and with quality results. Render times were 3 to 6 minutes a frame, allowing us to meet our tight production timeline.
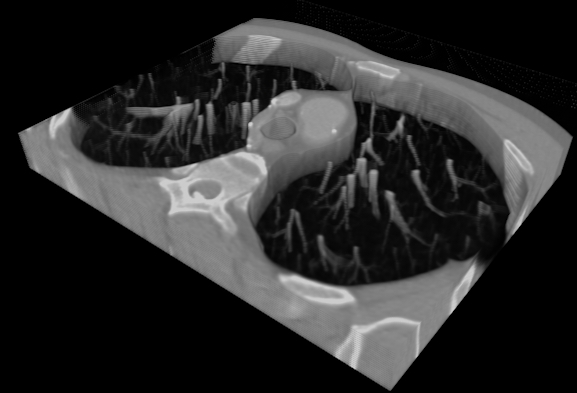
Handy C4D Diacom image reader plug-in developed by Kent Barber at GameLogicDesign Ltd in New Zealand.
Free Dicom image viewer:
http://www.gamelogicdesign.com/dicom.html
My C4D set up file for faking volume-metric look , after downloading plug-in from GameLogicDesign, can be downloaded at: https://www.dropbox.com/s/u69rzcy83imy877/Dicom-set-up-Minus-plug-in.zip?dl=0
I was having trouble using a cloner and random effector to get the images to stack in the correct order, so I went with a shader effector instead, and it seems to be working!
Its been 12 fun years learning how to first use Maya and then C4D on a 20 node render farm.
Maya, up until a few years ago simply did not come with a render farm manager. A third party party solution was required and our studio struggled With different managers, socks, smedge, render pal. I asked tech support to include a stable solution while trouble shooting MentalRay standalone with them on our farm. I was pleased when back-burner was indeed bundled with the Maya installer. After its debut though, backburner was un-bundled from the Maya installer and needed to be found and downloaded from an obscure support web page. back-burner has had connection issues with our firewalls from the start, but has proven an overall stable solution. To use MentalRay on the farm, a Maya network lic manger was needed. Each seat of Maya broadcasts 5 mental ray lic to the farm nodes. Each time we upgraded Maya it meant a lost day or two of production time getting the new lic manager and MentalRay lic to all work together. As a result, we only upgraded every other version of Maya in favor of production stability and time savings. My confidence in the current and future support of back-burner with Maya is limited, due to the installer issues noted above, lack of good documentation, new cloud based model of licencing, and MentalRay being un-bundled from the Maya installer.
Cinema 4D has come bundled with a network render manager for many years. Net Render (NR) up until R14 and Team Render (TR) was introduced in R15. Both NR and TR have unlimited render nodes and that means no licence manger is required to broadcast licenses. This also means less time setting up each new version of C4D on workstations and the farm. R15 and R16 TR was buggy and thankfully R17 has proven stable for production use. The exception is the displace deformer often causes geometry flickering. A caching work around exists, and hopefully the flicker will be fixed in R18.
High resolution print renders:
R17 TR local render option has been great for high resolution print stills. Although the set up can be troublesome, it is well worth the effort to get 20 render nodes working on a single image. An added bonus is that post effects like glows work seamlessly versus Maya’s tiling system. Maya Can break a large image render into smaller tiles using render flags and a command line. Visible tile seams Are seen with post effects like glows. The Maya fix to tile seams requires assembly of the tiles in post, and then applying effects. This is a time consuming process overall. Third party renders like render pal will help set up the code to feed to the render engine to split up the tiles, versus doing the math in your head with render flags sent in a command line render.
As a more artistic technical director, I have found the Maya install process and render farm support extremely frustrating over the years. Large movie studios have gurus to write code to customize their Maya pipeline. Cinema 4D on the other hand has been a pleasure to install and work with and requires no mastery of code to keep the farm running. Maxons technical support has worked hard to fix our TR issues and I am looking forward to installing future releases of Cinema.
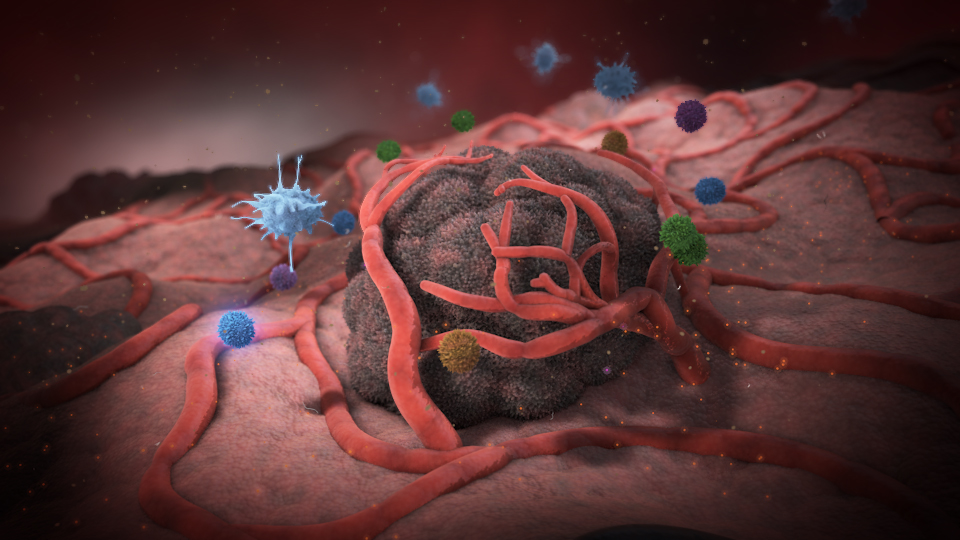
Another example of the reverse animation technique. An advantage of building the animation starting with the end stage model, is in placing the fibrin strands. The strands look like they are forming around the clot of red blood cells and activated platelets. This was accomplished by uv mapping the strands, and then animating texture maps to revel the strand models. Because we are using reverse animation, the end stage model is a known shape, and the strand models can then be created around the layers of the end stage model, without intersecting the RBCs and platelet models.
This complex time lapse animation of plaque building up was a challenge to create.
The reverse animation technique was very handy here. Baking and then time reversing simulations and particle effects can look like a building up effect. In this case, the finished or end stage plaque was built first and then slowly eroded away.
Static models of Rbcs and platelets were placed in the scene and then turned into particle instances using a script like this one.
vmvInstanceObjects 1.0.2 (maya script)
http://www.creativecrash.com/maya/script/vmvinstanceobjects
Next a gravity field and other particle fields were animated thru the static array of blood cell model instances… Peeling away the rbcs and platelets starting from the outside moving inwards and making them float upstream and away.
When the simulation was looking good, the particle instancers were converted back to individual 3d models with baked keyframes for position and rotation. There are many plug-ins and a few scripts available to bake the simulation. I prefer using a script like the one in the link below versus plug-ins. Plug-ins need to be recompiled with each new maya version, and scripts do not.
tk_bakeParticleInstancer 1.4.0 (maya script)
http://www.creativecrash.com/maya/script/tk_bakeparticleinstancer
What is blood pressure? The video shows the expansion of a blood vessel wall with each heart beat, the aorta expands in this movie!
Using Maya, the heart model was made to beat by using a simple lattice deformer with 2x2x2 division and also clusters for secondary motion. For reference, I used a movie clip of actual open heart surgery, and then isolated one beat from the clip. After tweaking the 3D models motion for a day or two, all animated parts where made into a Maya trax clip of a single heart beat of animation. The single trax beat was then able to be looped using the trax editor as many times as needed, and also speed up or down using the editor.
The RBCs inside the aorta are made using a single model of an RBC instanced onto a vast number of particles. The particles are shaped in the form of a donut or torus by animating an omni emitter around in a “circle”, and then setting an initial state for the particle. A per particle creation expression is also used to randomly rotate each RBC as each particle is created.
The aorta of the heart, and the aorta cross section, are modeled using the same nurbs curve “circle” that the emitter followed when forming the torus of particles. In Maya, particles can be deformed in just the same way as geometry can. The nice thing here is that the instanced RBCs are not stretched by the deformation of the particle. The RBCs simply follow the position of the deformed torus of particles.
A sculpt deformer was applied to both the torus of particles and also the Aorta’s geometry at the same time. Then the sculpt deformer and locator are parented inside the nurbs “circle” used for the emitters path, as well as parenting the torus of particles inside the “circle”.
The nurbs circle’s rotation was then animated over time in sync with the beat of the heart. The sculpt deformer that is parented inside the “circle” causes a bulge in the aorta wall as it slides around the geometry, and the same sculpt deformer causes the torus of particles RBCs to bulge out and fill in the aortas empty deformed space with each heart beat.
Usually I would use a per particle expression to rotate the instanced RBCs over time, according to each particles velocity. The faster each RBC travels, the faster it will rotate. However, the deformed particle shape did not allow for this per particle type of expression to be used. As a solution, I rotated only the single instanced RBC model used for all particles, and in sync with the heart beat. Because the RBCs motion is so fast, this solution could be used, and not seen as a fake rotation.